This articles reviews all the required steps needed for customers to connect their Spectrum Cloud environment to Trimble Integrations.
Connecting Trimble Integrations to Spectrum will require you to complete a number of steps. It is very important to complete each step. If you have any questions you can reach out to support.
Step 1: Connecting to Trimble Integrations and Creating a User
- Create an Infolink user using the Info-Link module in Spectrum first.
- If you need help on creating an Info-Link user please refer to screenshots at the bottom of this article.
- Once the account is created, reach out to Viewpoint Support and request the "Upgrade Info-Link access" form to have the users right elevated if needed:
- Spectrum will send you a form that will be required to authorize this change. The form will ask you to provide the name of the User and it will ask you to indicate if the user needs Read or Read/Write permissions. We only need Read permissions.
- If needed the IP Address to whitelist is 13.84.41.168
- Spectrum will send you a form that will be required to authorize this change. The form will ask you to provide the name of the User and it will ask you to indicate if the user needs Read or Read/Write permissions. We only need Read permissions.
- Send Trimble Integrations the following information:
-
- Spectrum URL (xxxx-data.dexterchaney.com)
- Database name
- Infolink username
- Spectrum company code
- Infolink user password (provided by Spectrum)
Step 2: Data Exchange URL and ID
Set up your Data Exchange URL and ID. To do so, please follow these instructions. Please provide the following to Trimble Integrations:
Data Exchange URL and ID
- Authorization ID created in Part 2
- The URL and Port Number from Part 3
If you have any questions, please don't hesitate to reach out.
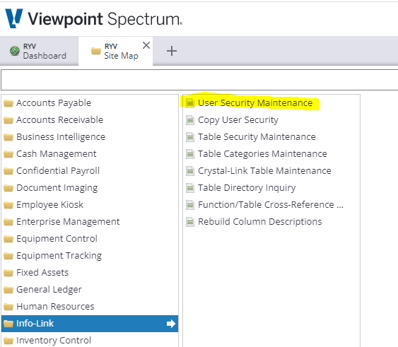
How to Create an Infolink User
- Navigate to Infolink > User Security Maintenace
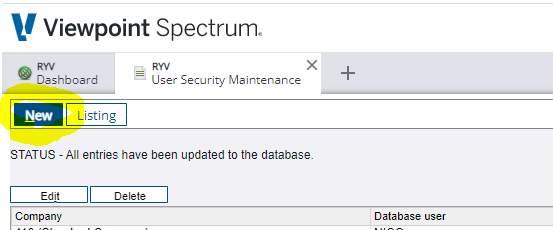
- Select “NEW”
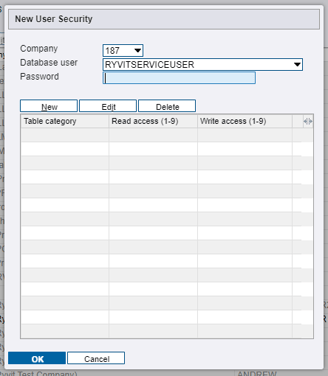
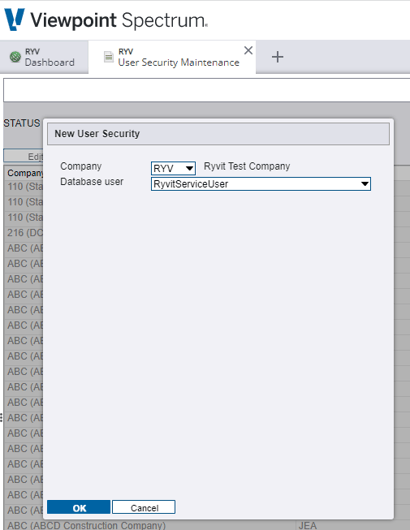
- Select the Company and enter “XChangeServiceUser” for the Database User and press ENTER (VERY IMPORTANT – it will NOT work if you press ONLY press OK)
- Enter a strong password and click OK. You do not need to add any information to this screen beyond creating a password!